Jobs and Applications#
You can submit Dell Data Processing Engine batch jobs, Spark Connect servers, and Jupyter Notebooks from the Starburst Enterprise web UI. Batch jobs, Spark Connect servers, and Jupyter Notebooks can also be managed programmatically with the CLI.
Batch jobs#
Click Jobs and Applications in the Dell Data Processing Engine section of the Starburst Enterprise web UI to view and manage batch jobs and Spark Connect servers. You must have the Spark runtime UI privilege to access the Jobs and Applications pane.
The Batch jobs tab shows a list of jobs and information about each job:
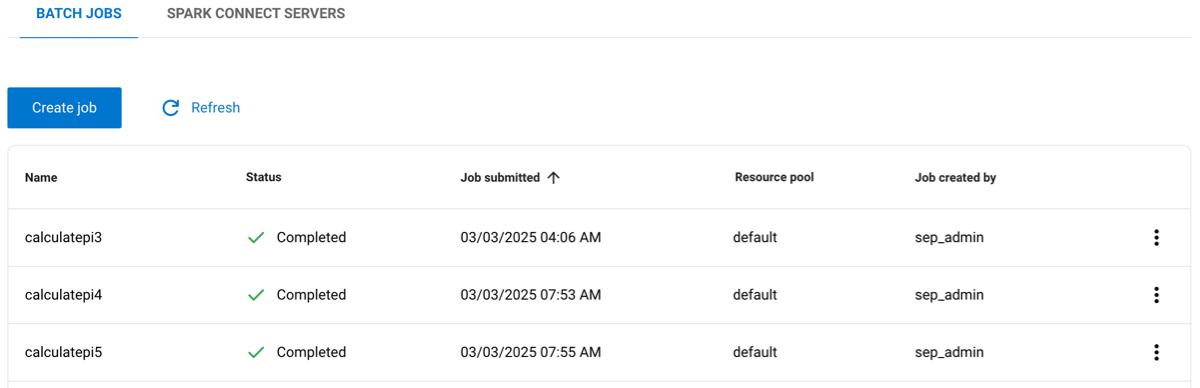
Name: The name given to the job.
Status: The current status of the job, such as completed, running, or pending.
Job submitted: The timestamp for when the job was submitted.
Resource pool: The name of the resource pool assigned to the job.
Job created by: The role that created the job.
Click the Name, Job submitted, or Job created by columns to reorganize the data in ascending or descending order.
The options menu for a Spark job lets you delete the job, download logs, and view the Spark Web UI or Spark History Server UI.
Create batch jobs#
To create a Spark batch job:
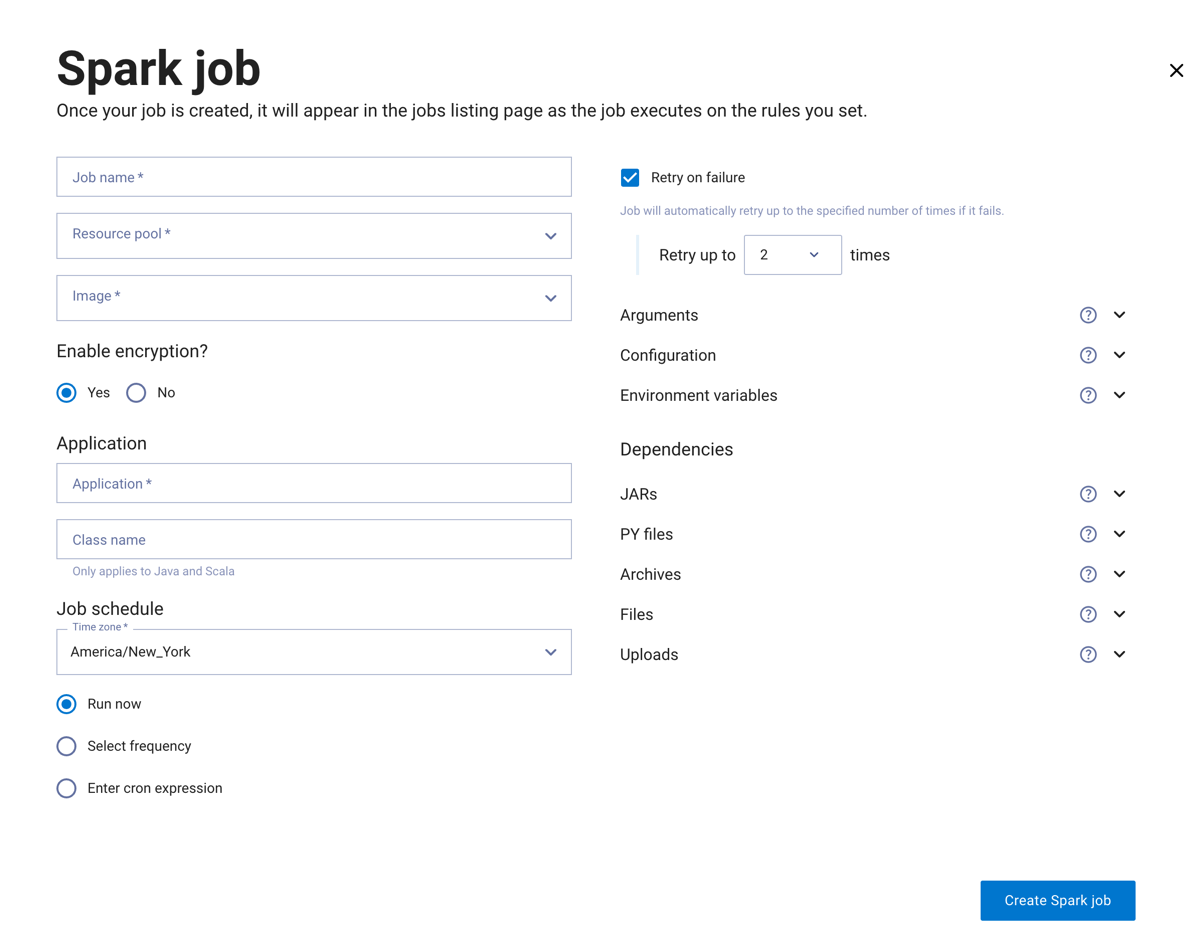
Click Create Spark job.
Enter a Job name, select a resource pool, and select an Image. See custom Spark images for details.
In the Application section, enter the file path URL for your application. Optionally enter a Class name (Java and Scala only) and choose whether to Enable encryption.
In the Job schedule section, select a Time zone, then choose Run now, Select frequency, or Enter cron expression.
Optionally configure Arguments, Configuration, Environment variables, Dependencies (JARs, PY files, Archives, Files, Uploads), or Retry on failure.
Click Create Spark job.
Warning
Batch jobs running on a node may fail if the node is rebooted. Automatic failover to another node is not guaranteed.
Delete batch job#
To delete a job, click the options menu for the job and select Delete job.
Spark History Server#
The Spark History Server is a web UI for monitoring running and completed Spark jobs. Click the options menu for a batch job and select Spark History Server UI to open it.
Warning
The Spark History Server UI can take up to 10 seconds to initialize after
you submit a job. If you see an Application not found error message, wait a
few seconds and try again.
See the Spark monitoring documentation for details on the available UI tabs and metrics.
View History Server logs#
To view the Spark History Server logs from the CLI:
./dell-data-processing-engine admin history-server-logs
Spark Connect servers#
In the Jobs and Applications pane, click the Spark Connect servers tab to view a list of your existing servers. You must have the Spark runtime UI privilege to access the Jobs and Applications pane.
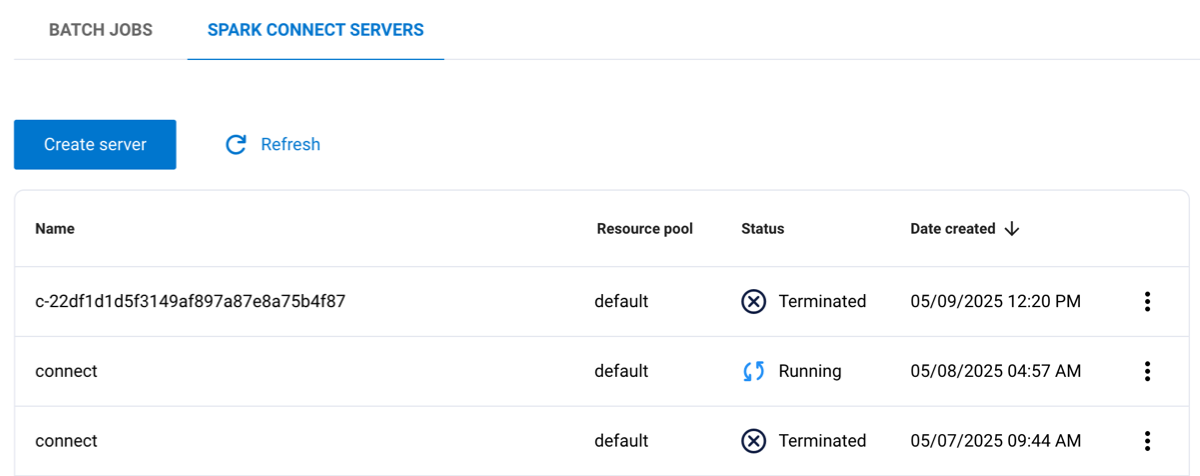
The following columns are listed:
Name: The name given to the server.
Resource pool: The name of the resource pool assigned to the server.
Status: The current status of the server, such as completed or running.
Date created: The timestamp for when the server was created.
Click the options menu for a server to download logs, view the Spark UI, generate a Spark Connect URL, terminate a running server, or delete the server.
Create Spark Connect server#
To create a Spark Connect server:
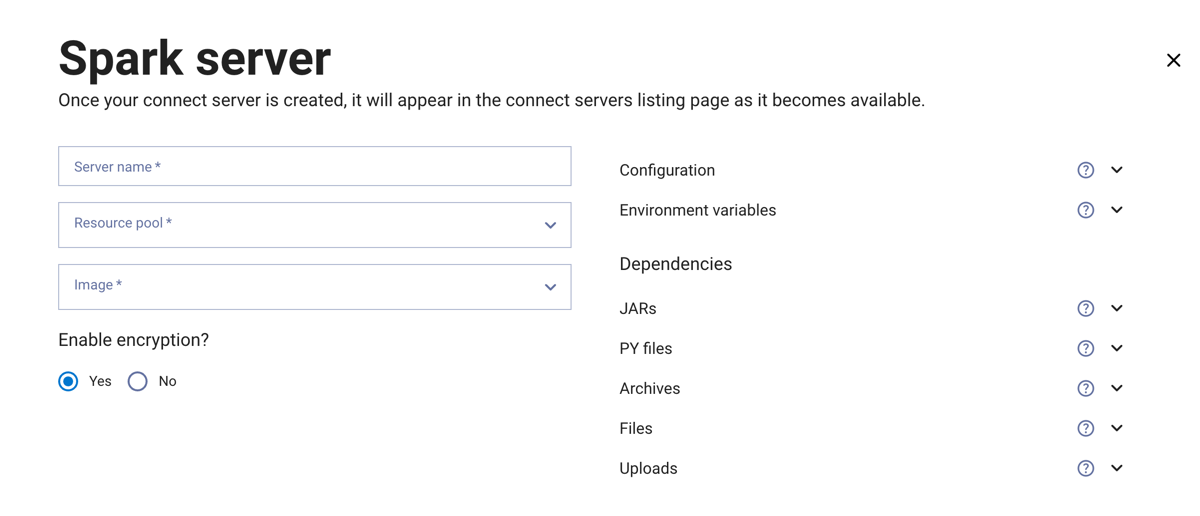
Click Create Spark server.
In the Spark server dialog, enter a Server name, select a resource pool, and select an Image. See custom Spark images for details.
Choose whether to Enable encryption.
Optionally configure Configuration, Environment variables, or Dependencies (JARs, PY files, Archives, Files, Uploads).
Click Create Spark server.
Generate Spark Connect URL#
To generate a connection URL for your server, click the options menu and select Generate Spark Connect URL. Use this URL to connect to the server from your Spark application.
Terminate server#
To stop a running server, click the options menu and select Terminate server. This option is only available for servers with a running status.
Delete Spark Connect server#
To delete a server, click the options menu for the server and select Delete server.
Jupyter Notebook servers#
Dell Data Processing Engine supports Jupyter Notebook servers, offering fast and interactive ways to explore your data. Users can view the Notebook interface from the Notebook servers tab. Access to the Notebook servers depends on the Jupyter Notebook privileges a user’s role has.
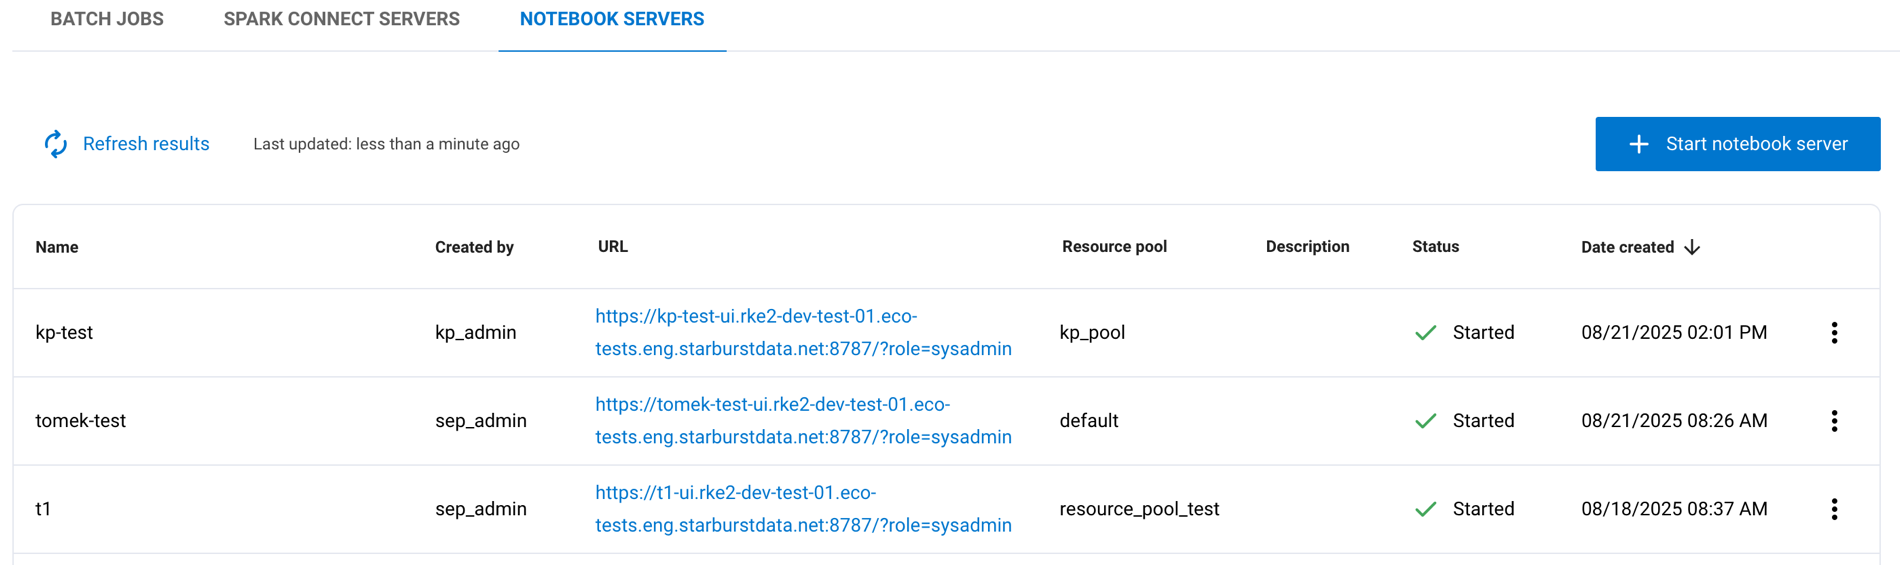
The following information is displayed about your Notebook servers:
Name: The name given to the server.
Created by: The user who created the server.
URL: The web address to access the server.
Resource pool: The resource pool allocated to the server.
Description: Additional information or notes about the server.
Status: The current state of the server, such as
StartedorShutdown.Date created: The timestamp for when the server was created.
Click the options menu for a server to perform additional actions such as starting a shutdown server, shutting down a running server, downloading logs, or deleting the server.
Jupyter Notebook privileges#
The following table lists privileges users must have to execute various Jupyter Notebook-related tasks:
Privilege |
Description |
|---|---|
|
|
|
|
Start Notebook server#
Click + Start Notebook server to open a dialog to launch a new server:
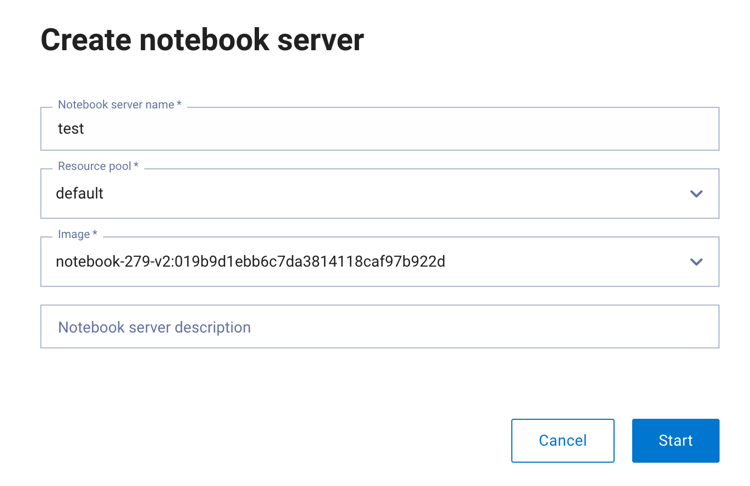
Give the server a name, assign a resource pool, select a Spark image, and optionally provide a description. Click Start.
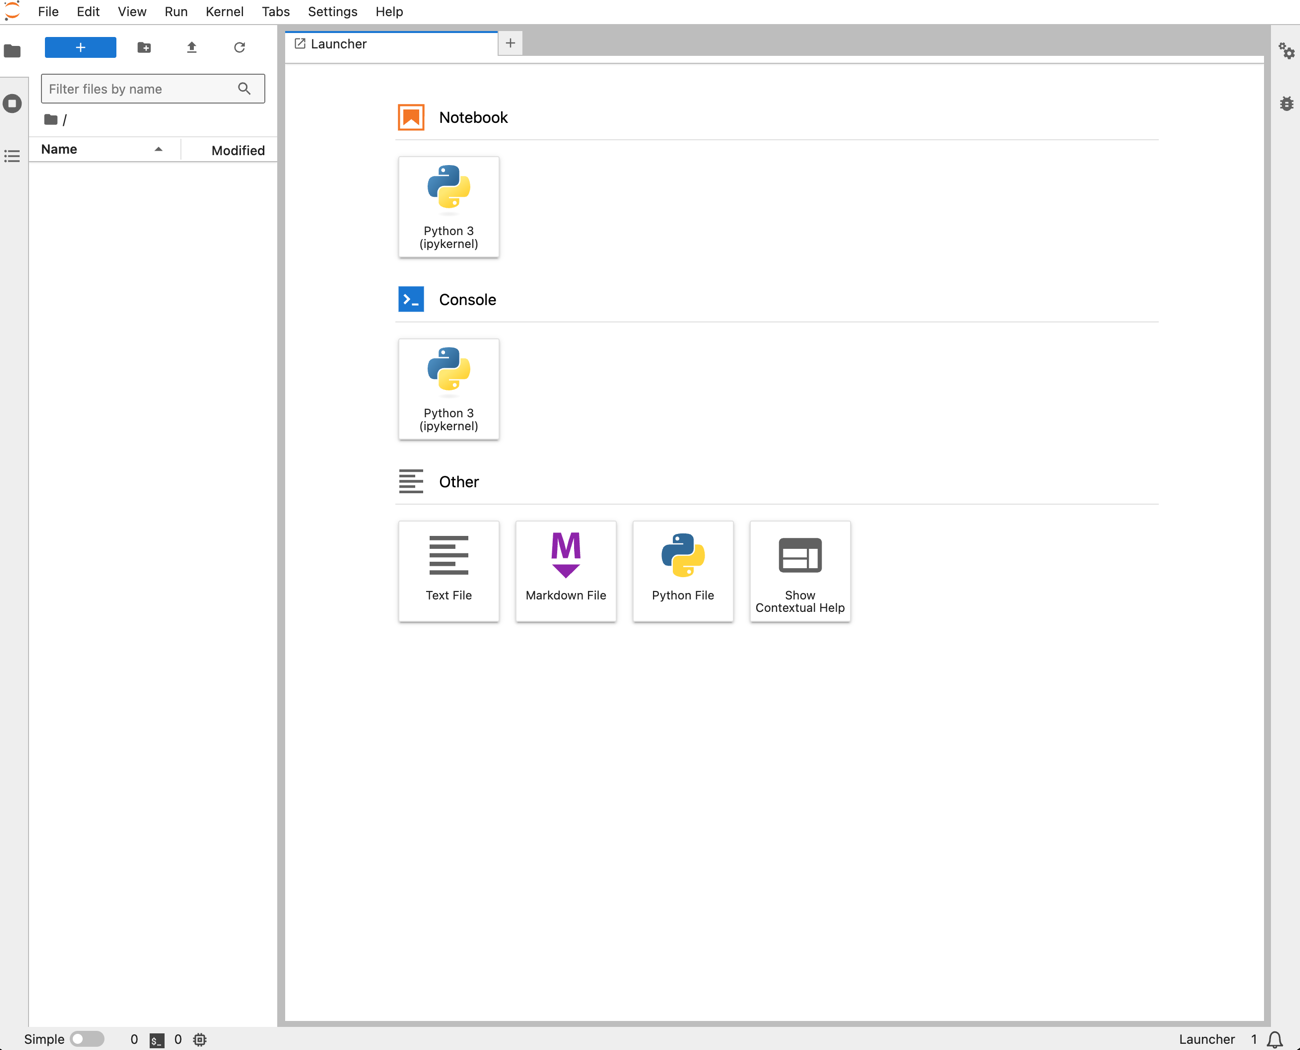
The new server displays in the server list with a Pending status for a few
moments before the URL column populates and the server is moved to the
Started status. Click the URL to open the server:
Delete Notebook server#
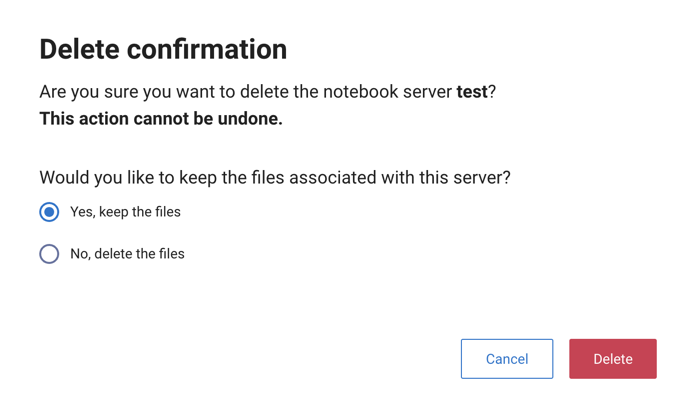
To delete an existing Jupyter Notebook server, open the options menu for a server, choose whether to keep the files associated with this server or not, and click Delete:
Notebook example#
The following shows a basic workflow for using Spark in a Jupyter Notebook:
Initiate your notebook with
SparkSession:from pyspark.sql import SparkSession spark = SparkSession.builder \ .remote("sc://<spark-connect-host>:<port>/token=<your-token>") \ .getOrCreate()
After you have created your
SparkSession, you can initialize and work with Spark DataFrames, such as the following:Create a DataFrame:
data = [("Alice", 34), ("Bob", 45), ("Cathy", 29)]
columns = ["Name", "Age"]
df = spark.createDataFrame(data, columns)
Show the DataFrame contents:
df.show()
+-----+---+
| Name|Age|
+-----+---+
|Alice| 34|
|  Bob| 45|
|Cathy| 29|
+-----+---+
Perform a basic transformation:
df_filtered = df.filter(df.Age > 30)
df_filtered.show()
+-----+---+
| Name|Age|
+-----+---+
|Alice| 34|
|  Bob| 45|
+-----+---+
View the official Jupyter Notebook documentation for more details.